Imagine craving delicious cold sorbet that is quick, fun, and unforgettable. Why settle for the basic when you can have multiple sweet pleas in your ice cream cups? Ready to have another one?
In This Post
What Are Ice Cream Cups?
Equivalent Between an Ice Cream Cake and a Cupcake
Ice cream cups are just the sweet bridge between a scoop of ice cream and a full-on ice cream cake. They are small, easy, and very fun to eat. Think of them as a mini celebration in a freezable cup. Perfect-for-birthday parties, summer BBQs, or just a quiet evening treat averse to baking.
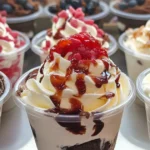
At the very core, these frozen treats are ice cream par excellence, followed by a cookie or brownie base. They are layered, always with a crunchy bottom, before the soft, icy ice cream is spooned in, and the tops are garnished with flurries of cookie crumbs, sprinkles, or a drizzle of some fudge. They are easy to make and easy enough to love.
So, what has led to this ice cream cup craze? Well, the number-one icing on top is the fact that they provide all the pleasures of an ice cream sandwich or that slice of cake without the mess or fuss of either. And two, they are customizable for you. You want a fruity version? Do a strawberry swirl. Craving something denser? There is peanut butter with chocolate. You have the fruits, the size, the presentation. That’s the magic in their frozen forms.
Best Ingredients
To replicate a good ice cream cup, you don’t need a highfalutin list of ingredients. The best recipes only demand three items: cookies, ice cream, and any topping of your choice. Easy enough, huh? Let’s find out how each of these things is likely to perform.
For the base, crushed cookies are always a great pick. Oreos are the classic, but break the mold with graham crackers, shortbread, or perhaps Rice Krispie treats. The cookie base provides a contrast between that crunch and the milkiness on top. Consider attempting a textured base, like that in this Rice Krispie chocolate chip cookie recipe, for an extra playful feeling that reaches into childhood.
The sky is the limit when it comes to ice cream. If you notice that the vanilla on its own starts tasting bland, you can start building structures around it with kind of bold choices in caramel swirls, mint chip, or coffee. Light, low-fat, and “light” ice creams spy a good opportunity here, truth be told: light’s texture doesn’t change after freezing and being scooped; these textures also have extraordinary synergy with heavier toppings or mix-ins.
Crushed cookies win every time on toppings; other participants in a taste test would be milk chocolate or semisweet cups, mini marshmallows, chopped nuts, miniature colorful candy pieces, which can dip between icy delights and ice-cream lips. How about something more impressive with bits of pretzel, chip, or a nice height of caramel? Lots more options; that is why people love these frozen goodies.
Three-Ingredient Recipes That Pop
Forget about overthinking. A batch of mouth-watering ice cream cups can be whipped up in a jiffy with three ingredients you can find either in your pantry or freezer: vanilla ice cream, Oreos, and chocolate fudge. That’s it. Crush some cookies, mix up some fudge, which then becomes the base layer, then press it into a muffin liner. Toss in some softened ice cream, sprinkle with crushed cookie crumbs, and put it in the freezer.
It’s the superb choice for busy mommies, weekend treat preparers, or last-minute dessert-seekers because it is simple, cheap, yet amazingly delicious to the party of old kids. And let’s face it – you could grab a few of these ahead of time, stuff them in your freezer, and whip up a few when sugar cravings hit.
Less Powers More: Simple Combos That Work
Sometimes, simplicity lends the best solutions. Pair two great flavors and you strike gold. Peanut butter and chocolate are two classic examples of a winning combination. Then there’s cookies and cream. Strawberry and vanilla. Except, if you feel like blending, layer different flavors.
For someone who prefers not to bake but dish impressively, iced delights are the answer. Their diminutive stature results in their simplicity to serve, as the layers of taste do all the talking. This is an ideal alternative for anyone enchanted with dessert frozen in cups but who seeks actually something out-of-the-ordinary from the usual scoop.
Having a clear concept about the identity of ice cream cups and a surge in its popularity; we are about to bring a little more new meaning into existence. In the coming up next, this complete step-by-step procedure could help you make your own out of scratch from your home without any awkward details.
DIY Ice Cream Cups, A Step-by-Step Guide
Collect The Ingredients, Soften the Ice Cream, and Cram the Base
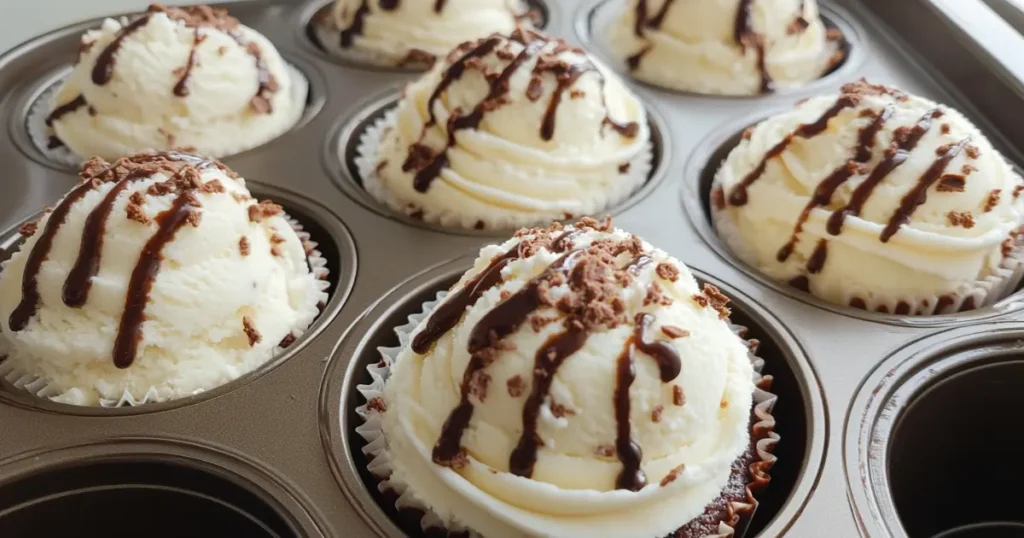
Before we start with the layering, shall we first look at gathering your ingredients? The main ingredients are a tub of preferred ice cream, base material (crushed cookies, cereals, graham crackers, etc.), and any preferred toppings. Also line your muffin tin or silicone molds with cupcake liners for easier cleaning. It might help to have a spoon and a food processor available for driframe_on. Do get the ice cream out of the freezer and allow it to soften for about 10–15 minutes. If you are in a hurry, pop the tub in the microwave for 15–30 seconds. Softened ice cream spreads well and joys the cup more evenly, so during this time, good to-go-flavor ingredients_etc.-start your base. Most folks use crushed up Oreos! Haha; however, graham crackers, chocolate chips, or even pieces of cereals like Rice Krispies would be fantastic.
Now grind your base; the whole procedure is very simple with any food processor. A sealed Ziploc with a rolling pin should also workbut potato chips add a fun crunch, somewhat like it is utilized in a recipe for chocolate potato chips listed here. Certain heart candy for sweet and salty, please.
Layering and Freezing
By the time the previously blended base is carried out, mix it with something gooey for a binding element (hot fudge, melted chocolate, or marshmallow cream). Divide a dollop or dollops into the lined cups. Pat it flat with a light pressing onto the surface using your fingers or the back of a spoon.
Now, layer your ice cream over the top; fill each of the cups—overfill just slightly, leaving room for a cute garnish on top. Smooth the ice cream fillings over the cup with the flat end of the spoon. You might add any swirling sauces or folding in some additional bits, like cookie chunks or fruit. But you could opt for your ice cream cup with its own identity in your very own way.
Do you expect your ice cream cup to make a statement at a party? Try a few layers of ice cream with the vibrant colors and flavors playing with each other. Start with vanilla on the bottom, next a layer of strawberry, topped with chocolate ice cream. Just freeze each layer so it would maintain its shape.
Common Mistakes to Avoid
Those making these for the first time get messed up sometimes, but there’s still hope for you. One major mistake may have been using a hard ice cream. It won’t spread evenly, although it will freeze with cracks. Too much melted, however, and the base will turn soggy. Perfect soft-serve consistency is what you should be aiming for.
Do not keep the base thin. Overspeed prevents one from tasting too much of any taste, as the ice cream just swallows it up. Once we get the flavor of everything nice and cold, we want it to counter weight the softness with crunch. If the base looks a bit dry still, add more fudge or melted butter.
If the cups are assembled, put them for at least 30 minutes in the freezer before the servings. If the cases are made ahead of time, they need a few hours in the freezer. Once they’re solid enough to handle, you can then transfer them to a sealed container that should be deep freeze-proof.
Best Storage, Longevity
These things are a great make-ahead item, seeing as they are frozen. However, like all frozen foods, they should be properly frozen then thrown into the appropriate storage. When properly frozen, it is advised to store frozen dessert in an air-tight container or a Darwin special freezer bag. Being lined with cupcake liners, those should easily slide. Just be gentle, as they would not be completely frozen.
Need to stack them? Place a sheet of parchment paper between layers to prevent sticking. Ice cream cups can technically sit in your freezer for a month, although one doubts they would last that long. Put them in the front of the freezer so you don’t forget they are there. Easy pick up, hard to refuse.
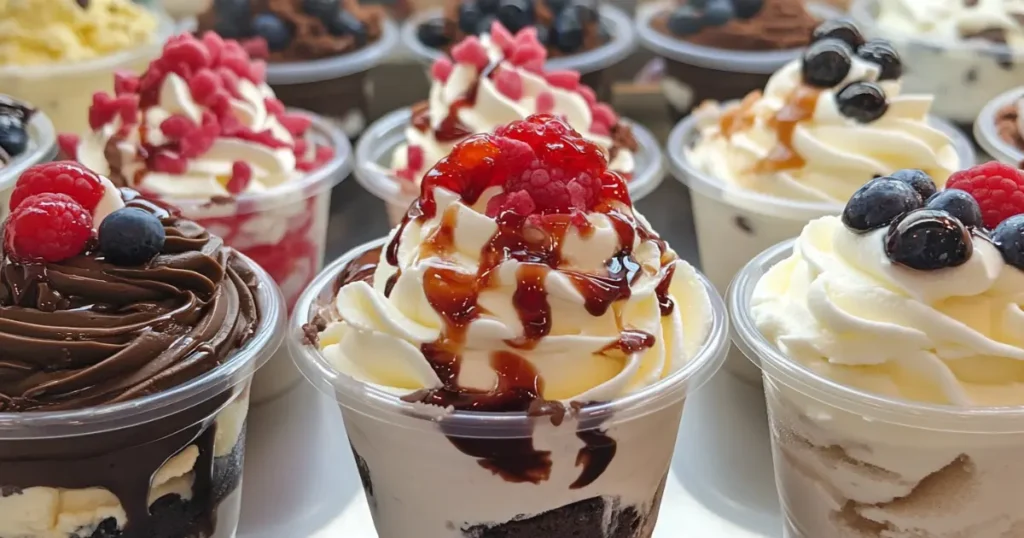
To make them look more festive, top them off with toppings just before serving. Whipped cream, any berries, or a simple melted chocolate drizzle will do. Additionally, why not have a dessert-bar-style setup and allow everyone to build their own?
In just a few quick steps, what could make the cutest and fuss-free treat made by you? Further, in the next section, you can feed your mind with various flavors and exceptional versions for ice cream cups that work every season and every craving.
Unique Takes on Ice Cream Cups in Your Own Kitchen
Family-Friendly Fusions
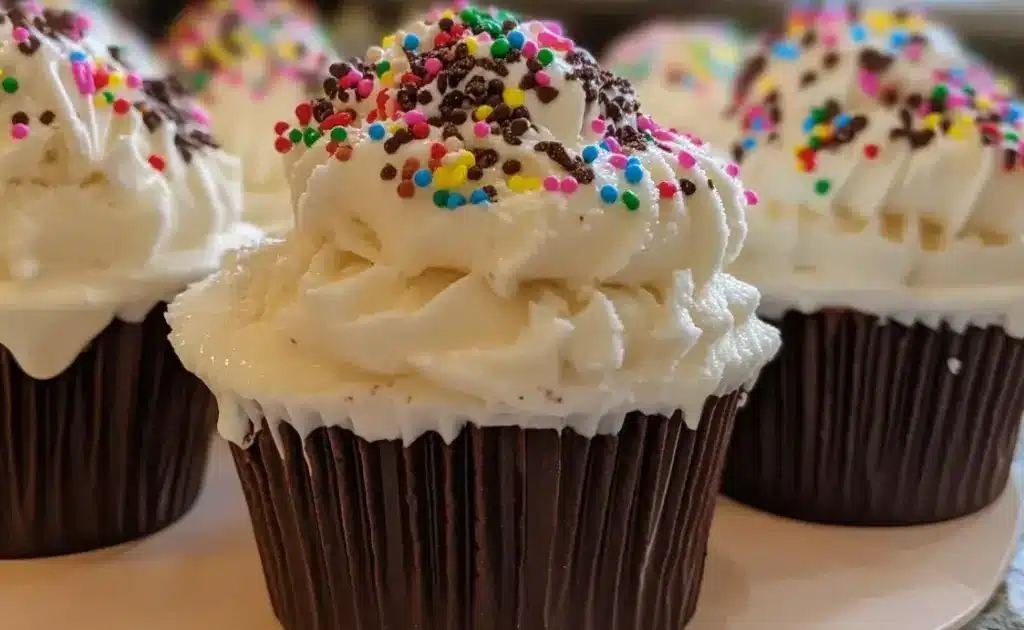
Individual ice cream cups make for a great self-indulgent treat, and the blank canvas of flavours and add-on toppings make it a totally memorable experience. The kids usually end up eating the most brightly colored and weird things; in this case, ice creams could hardly be more perfect to play around with! To prime the kids for this eating adventure, stack rainbow sprinkles or mini chocolate chips on top of cookie dough ice cream. To dial it up a notch and go a bit off-the-wall, crush candy bars into the mix, or swirl peanut butter around before setting it in the freezer.
If the whole family is around, you may want to make the ever-popular cookies and cream ice cream, where sauteed Oreo cookie chunks are mixed into vanilla with loads of whipped cream on top. This one is also good if you find yourself in a bit of a hurry but want to impress.
For those of you out there who really are all about that cereal, section as well. Carefully place fruity cereal or chocolate flakes in between your crunching base and ice cream complement. It’s all different textures and colours popping out in every bit. Through such smart swaps did the far from exceptional ice cream cups suddenly bloom into becoming an enjoyable snack the entire family will gobble up.
Healthy Takes
One need not always give up the treat that comes with a lot of sense, and making the change requires actually a small enough adjustment. Ice cream cups are meltable to change for just about everything. First, in staying smart, lower the fat or dairy-free ice cream. There are foods with oat milk, almond milk, and even coconut frozen desserts that balance creamy with the rich one.
Some nuts smushed into bits, granola, or nuts and seeds mix alongside honey. Then lend, here they will not lack of taste or help for more fiber or protein. Another good option would be mashed banana puree if you are battling added sugars.
What makes delish without too much of anything there? Try adding in a teaspoon of cinnamon, cocoa powder, or vanilla extract. And nut butter swiped between layers adds an extra bit of flavor and has everything in it that is completely natural. That wraps up the good-for-you, totally obliging sweet for your lover.
Now for Vegan and Dairy-Free
Vegan ice cream cups are just as good as regular. Use plant-based ice cream, and stick with natural fruit ingredients and coconut or chocolate made with no milk. Toss over some fresh berries or drizzle maple syrup over them when done. Excellent for those who are dairy-free or just looking for a lighter treat.
Themed Variations (Holiday, Summer, Fall)
Ice cream cup variations for each season do have offerings to cater to each taste. In summer, go fresh with strawberries, mangoes, or pineapple crushed in layers on the cup. Here’s a tropical angle-try coconut ice cream with a graham cracker base and pineapple toppings.
Winterize that bad boy-vanilla Ice cream can be pumped with pumpkin spice or cinnamon and insert smashed ginger snaps or lay in some apple pie filling. Boy, don’t these seasonal tweaks give your frozen dessert a cozy hug? You may want to try something like this copycat pumpkin muffin recipe with any fall-related treats.
The season of winter calls for festive peppermints or crushed candy canes in the ice cream, while peppermint chocolate terrine with chocolate layers screams Holiday Spirit. Marshmallows or peppermint bark-space between them render the otherwise standalone cocoa cream reminiscent of a classic winter hot cocoa.
Now for the Spring-should have something fruity and lighter. Want to scoop lemon sorbet into crushed sweet fruit ice cream plus a sprinkle of granola? Springy combos will make your heart flutter once the weather busts open into sunshine.
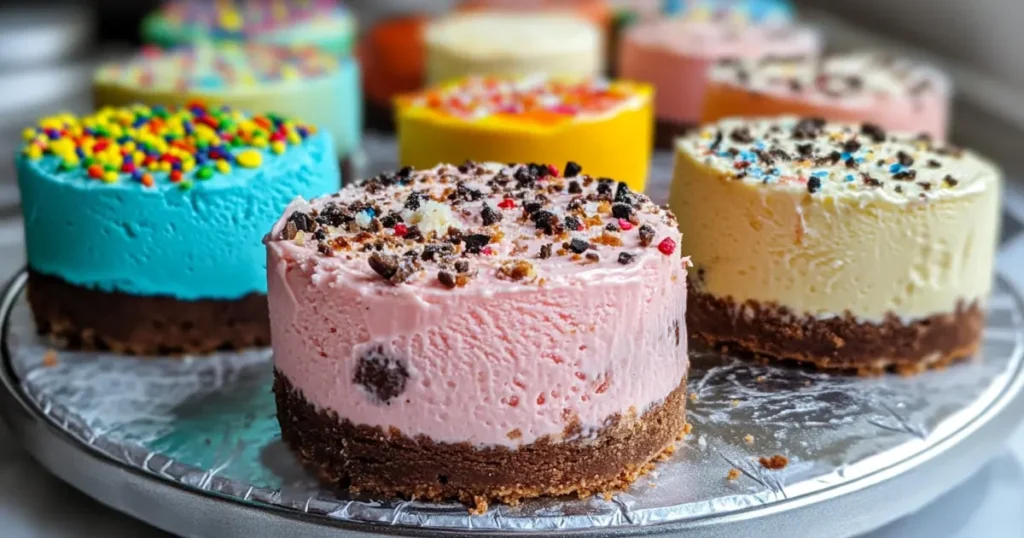
Exquisite Mini Ice Cream Cakes for Special Celebrations
Need some celebration in your life? These ice cream cups turned into tiny cakes are easily the most adorable things to cook up! Select different flavors; let them set on their own separately by pouring into the moulds of a muffin tin, then stack them together at the very moment they are served up. Depending on the need, a layer of frosting or whipped cream between some of the bits will take it up on the drama. An assortment of flavors might make it quite as adventurous; it will feel just like a degustation for iced treats.
Every birthday, graduation bash or holiday dinner will just be that much other with delicious fails like this! Have a thing for some other flavor, color, or style that marks the event or celebrates the taste?
Whether it’s hot weather or you’re simply out for a refreshingly good pick-me-up, why not throw down these delightful ideas to make even a plain ice cream cup turn into a pretty substantial dessert fit for the freezer? Ice cream cups are absolutely lovely; they are rich in fun in that their possibilities even manage to grow.
Top Gear For the Ice Cream Cup Game
Problems and Solutions
In the first place, ice cream is an easy thing to make. However, a small mistake can change its outcome drastically. For now, we will discuss the most common issues and rectify them effectively. Then, liquid ice creams that are too runny before they go to freeze will either make the base go soggy if layered immediately or freeze unevenly. Soften the ice cream only to be able to scoop it. If it starts to turn, freeze it for covering after putting in a layer.
But, the base still breaks apart. More binding may be needed. Every time you combine a batch of crushed cookies or crackers, add something sticky for gluing purposes, such as melted fudge, nut butter or marshmallow cream. This way, the base will stretch while freezing.
Next, what if your ice cream cups turn out to be all icy or hard? Snow-flake whip your heart out; nice, but you’re not freezing ice. The trick here is to set the freezer setting to a consistent cold. Outside air causes freezer door air to condense, making the ice cream cups freeze slowly. For smooth results, you would want to place a lid or plastic wrap directly over each cup to avoid any drying of the surface through air.
Thinking About How to Store These Babies Long Term?
Storage is a biggie. They store rather well in the freezer-don’t get too excited, not without some cold storage brains. Freeze solid and then move to an airtight container or wrap each one in wax paper separately, then store in freezer bags. It protects both flavors and textures.
Mark the date on the container. The frozen cups can stay in the freezer for up to a month—but display their best in the first two weeks, retaining enough of the creaminess since the longer time exposes them to off-flavors from the freezer and loses their creaminess.
When stacking, beware there’s no impact damage. Line them up in the container with a sheet of parchment paper or foil in between to save them from sticking to each other or from any breakage when pulled out. For a casual party or special events, fix ice-cream cups beforehand and dress them up just before serving.
FAQs
Can I make my ice cream cups in advance?
It’s all up to you—days ahead or even weeks ahead—preparing ice cream cups early on could make your party or gathering some of the spare time. Just keep them sealed in an airtight container, and decorate right before serving to enjoy a fresh look.
Whit kind of molds should I use to make my ice-cream cups?
Out of the various other molds, muffin tins are your best bet; line them with paper cups and removal is pretty easy. Silicone molds are the way to go and help to make the process less sticky. Small glass jars or plastic highball drinks can work as well if no-bake is a part of your presentation plan.
For how long is it considered safe to leave ice-cream cups in the freezer?
Ice cream cups will remain in the freezer for a period of up to 30 days if properly preserved. They should still be relished in two weeks from their creation for better taste and texture. For good management, avoid strong-smelling foods that might smother the original flavors.
Can I use non-dairy ice cream in these recipes?
Surely! Others have opted for almond milk and oat milk or special coconut-based ice creams for vegan or lactose-free versions. These non-dairy ice-cream versions freeze well and taste good with fresh toppings like fruits, nuts, or dark chocolate. For more dairy-free dessert inspiration, take a look at this bagels and dairy-free cream cheese guide for more pairing ideas.
Which toppings are still nice and crunchy even after being frozen?
Certain choices keep their crunch better than others. Some crunchy toppings to try are crushed cookies, nuts, mini pretzels, or cereal. Marshmallows or gummy candy will become hard and should be avoided. Chocolate chips and toasted coconut add texture and contrast to the creamy ice cream while staying crunchy.
Irresistible Ice Cream Cups
- Total Time: 30 minutes (includes freezing)
- Yield: 6 servings
Description
Quick, no-bake frozen treats layered with cookies, ice cream, and your favorite toppings. Perfect for any occasion.
Ingredients
12 Oreo cookies (or cookies of choice)
2 cups vanilla ice cream (softened)
3 tablespoons hot fudge sauce
Optional: whipped cream, crushed candy, nuts, sprinkles
Instructions
Place ice cream on the counter for 10–15 minutes to soften.
Crush 10 Oreo cookies using a food processor or plastic bag and rolling pin.
Mix crushed cookies with hot fudge to form a sticky base.
Press the base into 6 lined muffin cups using a spoon.
Scoop softened ice cream into each cup and smooth the tops.
Crush the remaining 2 cookies and sprinkle over each ice cream layer.
Freeze for 30 minutes or until fully set.
Serve as is or top with whipped cream and toppings before serving.
Notes
Try using different ice cream flavors like chocolate, strawberry, or mint.
You can use graham crackers or cereal instead of cookies.
Store leftovers in an airtight container for up to 1 month.
Great for kids’ parties, holidays, or hot summer days.
- Prep Time: 10 minutes
- Category: Dessert
- Method: Freezing / No-Bake
- Cuisine: American
Nutrition
- Serving Size: 1 ice cream cup
- Calories: 207 kcal
- Sugar: 13 g
- Sodium: 143 mg
- Fat: 9 g
- Saturated Fat: 2 g
- Unsaturated Fat: 6 g
- Carbohydrates: 32 g
- Fiber: 1 g
- Protein: 6 g
- Cholesterol: 1 mg
Keywords: ice cream cups, frozen dessert, no-bake dessert, mini ice cream cakes, summer treats